

Key Takeaways
Why Sequence Is the Real Project Manager
Most kitchen remodels don't fail because of bad materials or even bad contractors. They fail because work happens out of order. When a tile installer shows up before the plumber has moved a drain line, someone's work gets torn out. When countertops are templated before cabinets are fully shimmed and leveled, the stone comes back wrong. These aren't freak accidents - they're predictable consequences of skipping a sequencing plan.
A kitchen remodel touches nearly every trade in the house: demolition, structural, plumbing, electrical, HVAC, insulation, drywall, flooring, cabinetry, countertops, tile, appliances, painting, and trim. Each one has a dependency. Understanding those dependencies before the first wall comes down is the single most valuable thing a homeowner can do. For a deeper look at how these phases connect, see the rough-in, finish, and trim phases of a home renovation explained - the same logic applies directly to kitchens.
If you're also weighing whether to open up the kitchen to an adjacent room, read through what an open-concept conversion actually involves before finalizing your plans - structural changes affect every downstream trade.
What you will need
The Right Order, Phase by Phase
The steps below reflect the standard industry sequence for a full kitchen remodel. Partial remodels may skip phases, but the relative order within each phase still applies.
Lock In Design, Permits, and Material Orders
No demolition should begin until your layout is finalized, permits are applied for, and long-lead materials are on order. Changes after demo starts cost significantly more than changes on paper. Confirm appliance dimensions, cabinet configurations, and plumbing/electrical relocations with your design before anything is touched.
Demolition
Remove existing cabinets, countertops, appliances, flooring (if being replaced), and any walls identified in your plan. Disconnect utilities before demo - plumbing shutoffs, electrical breakers, and gas lines must be properly isolated first. If you're unsure about gas line disconnection, hire a licensed plumber or gas fitter.
Structural Work
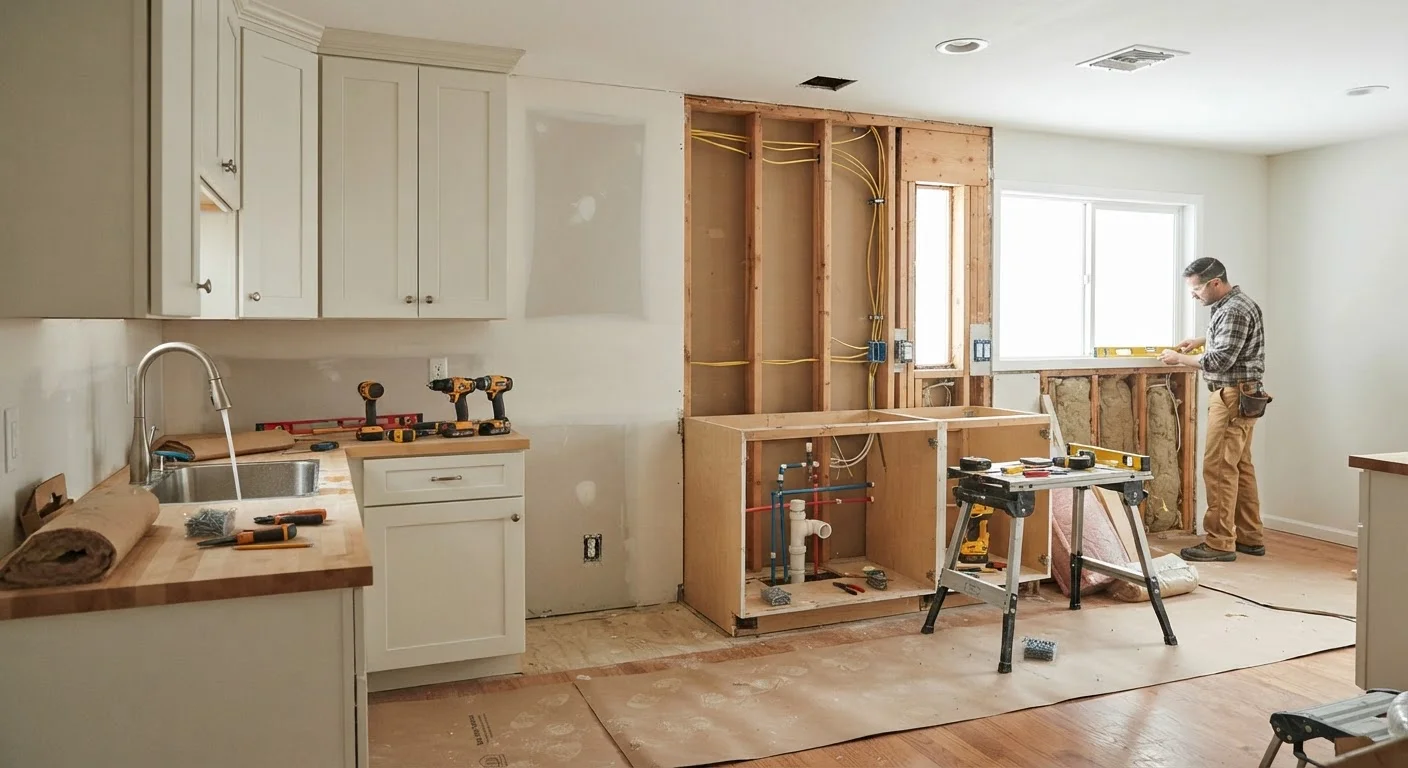
If walls are being moved, headers installed, or beams added, this work happens immediately after demo. All structural modifications must be completed and inspected before any trade work begins inside those walls.
Rough-In Plumbing, Electrical, and HVAC
Plumbers relocate drains and supply lines; electricians rough in new circuits and outlet locations; HVAC contractors extend or reroute ductwork and install range hood rough-in if needed. All three trades work inside open walls and ceiling cavities. Schedule them to avoid conflicts - they often need the same spaces and can block each other.
Inspections, Insulation, and Drywall
Rough-in inspections must pass before walls close. After inspection sign-off, insulate exterior walls and any walls requiring soundproofing, then hang and finish drywall. Drywall finishing (taping, mudding, sanding) takes multiple days to cure properly - don't rush it.
Priming and Pre-Paint
Prime and apply at least one coat of paint before cabinets are installed. It's far easier to paint open walls than to cut in carefully around installed cabinetry later. Final paint touch-ups happen at the end, but the bulk of painting is done here.
Flooring (If Running Under Cabinets)
If your flooring choice - hardwood, tile, or luxury vinyl - will run under the cabinets, install it now before cabinets go in. If the flooring will butt up against the cabinet base, it can be installed after cabinets are set. Confirm this with your flooring installer before scheduling.
Cabinet Installation
Upper cabinets are installed before lower cabinets so installers aren't working over the base boxes. Cabinets must be level and plumb - this directly affects countertop fit and drawer/door operation. Shim carefully and check every run with a level before securing.
Countertop Templating and Fabrication
After all base cabinets are set and leveled, a countertop fabricator comes to template (measure) the exact dimensions. Stone and solid-surface countertops are then cut to spec and typically delivered and installed 1-2 weeks later. Do not template before cabinets are fully installed and settled.
Appliance Installation and Plumbing Trim-Out
Once countertops are in, plumbers complete the trim-out: sink, faucet, garbage disposal, and dishwasher supply/drain connections. Built-in appliances - range, dishwasher, refrigerator - are installed and tested. Confirm all appliances fit their openings before finish work begins around them.
Tile Backsplash, Flooring Finish, and Trim
Install backsplash tile after countertops are in so you can set the tile layout correctly from the counter edge up. Complete any remaining flooring work (transitions, thresholds). Install baseboard, door casing, and crown molding if applicable. Caulk all joints between countertops, backsplash, and cabinets.
Final Paint, Hardware, and Punch List
Touch up paint where needed, install cabinet hardware (pulls, knobs), and complete your punch list - the running list of minor items that need correction or finishing. Do a full walkthrough with your contractor if applicable, noting anything that doesn't meet spec or needs adjustment before final payment.
Flooring Sequence Is a Decision, Not a Default
Whether your new flooring goes in before or after cabinets depends on the material and your design intent - there's no universal rule. Discuss this explicitly with both your flooring installer and your cabinet installer before scheduling either trade. Getting this wrong can mean pulling cabinets or cutting flooring after the fact.
One sequencing mistake that catches many homeowners: flooring. If you plan to install hardwood or tile that will run under your cabinets, it must go in before cabinet installation. If your flooring runs up to the cabinets (not under them), it goes in after. Decide this before ordering materials, because it affects how much flooring you buy and when you schedule the installer.
Budget planning should run parallel to - not after - your sequencing plan. Renovation budgeting principles that prevent midproject surprises can help you build realistic cost estimates that account for trade sequencing and material lead times before work begins.
Coordinating Trades Without Losing Your Mind
Once you know the sequence, the practical challenge becomes scheduling. Tradespeople have other jobs. Inspectors have limited availability. Materials have lead times - cabinets, in particular, can take six to twelve weeks from order to delivery. Any one of those variables can stall a project for days or weeks if not anticipated.
Build your schedule backward from your target completion date and work forward to find your true start date. Identify the items with the longest lead times and order them first - often cabinets and countertop material. Schedule your permit application early; many jurisdictions require inspections at rough-in stage before walls can close, and inspection wait times vary widely.
Material Lead Times Can Derail Your Timeline
Cabinets, countertop slabs, and specialty appliances can take weeks - sometimes months - to arrive after ordering. If materials aren't on-site when a trade is scheduled, you'll pay for idle time or lose your spot on their calendar. Build lead times into your schedule before you book any contractors.
If you're working with contractors, a written schedule shared with every trade helps enormously. It sets expectations, reduces idle days, and gives you a paper trail when timelines slip. What homeowners need to know before talking to contractors covers how to structure those conversations so everyone starts on the same page.
Kitchen remodels are more complex than bathrooms in terms of trade overlap, but the sequencing discipline is the same. If you've already tackled a bath, the bathroom renovation roadmap offers a useful comparison for how phased work flows in a smaller space.