

Key Takeaways
Grout vs. Caulk: Understanding the Difference
Grout and caulk look similar at a glance, but they serve distinct purposes and fail in different ways. Grout is a cement-based filler used between tiles on a flat surface - shower walls, tub surrounds, and bathroom floors. It is rigid and intended to bond tiles together while resisting moisture and staining.
Caulk is a flexible sealant applied where two surfaces meet at a change in plane or material - for example, where tile meets the tub rim, where the tub meets the wall, or around a toilet base. Because these joints experience slight movement from temperature changes, foot traffic, and vibration, they need a material that flexes rather than cracks.
A common mistake is using grout in a joint that needs caulk, or vice versa. Rigid grout in a flexible joint will crack within months. Caulk between flat tile runs will trap moisture rather than drain it properly. Using the right material in the right place is the foundation of a watertight bathroom.
For a broader look at how bathroom waterproofing fits into a full remodel, see our first-timer's bathroom renovation roadmap.
Signs Your Grout Needs Replacing
Grout doesn't last forever, especially in a humid environment with daily water exposure. Here are the clearest signals that your grout has reached the end of its useful life:
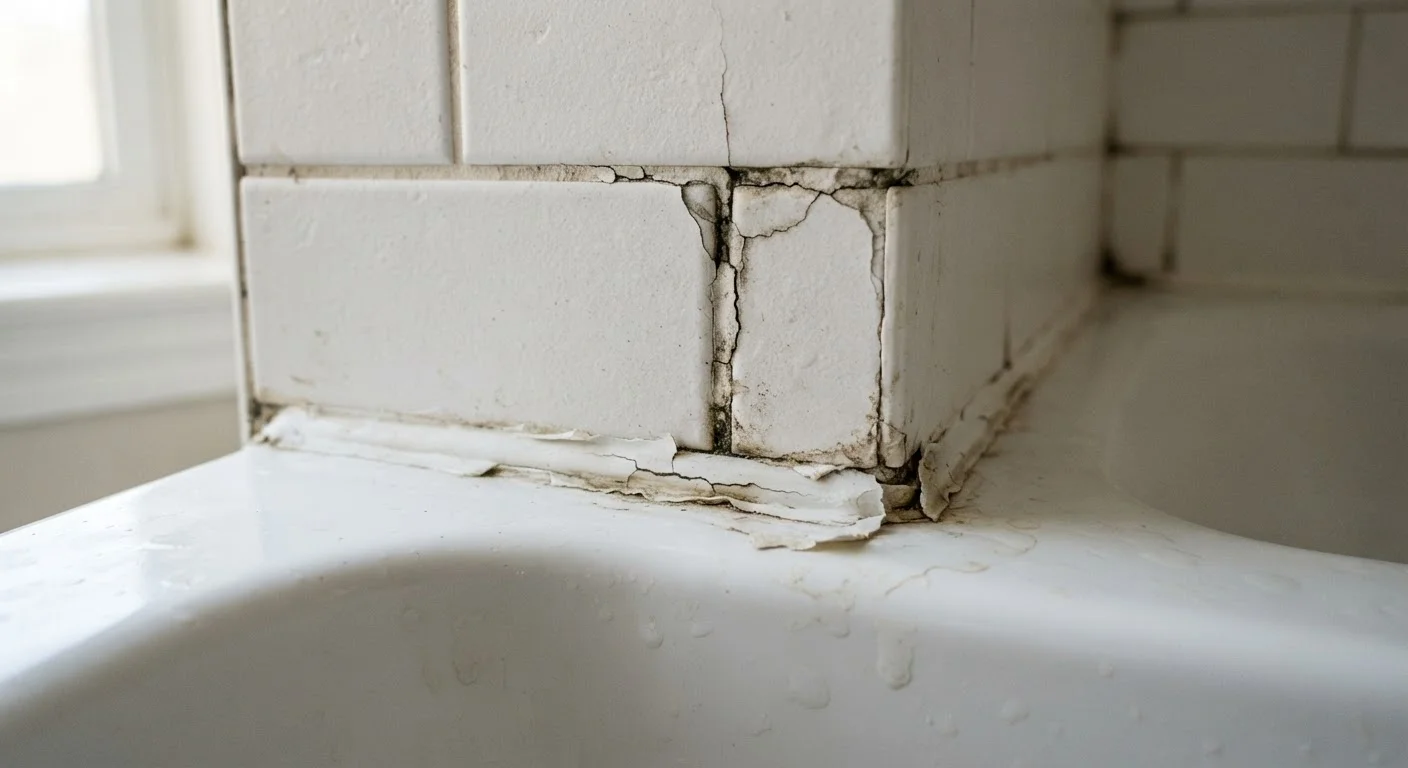
- Cracking or crumbling: Grout that visibly breaks apart or has pieces missing is no longer forming a watertight barrier.
- Hollow sound: Tap along grout lines with a coin or screwdriver handle. A hollow or dull thud can mean water has already worked behind the tile.
- Persistent dark staining: Surface discoloration from mold or mildew that doesn't respond to cleaning is a sign moisture is living in or behind the grout.
- Eroded or sunken lines: Grout that has receded below the tile surface has thinned enough to let water penetrate freely.
Minor surface staining can sometimes be addressed with grout cleaning and sealing rather than full replacement. But cracking, crumbling, or hollow-sounding grout generally requires removal and regrouting. Putting it off can allow water to reach the backer board or subfloor - damage that is significantly more expensive to repair. This is exactly the kind of maintenance delay described in our article on plumbing repairs homeowners often delay.
Don't Ignore a Hollow Tile Sound
A hollow sound when you tap tiles near a water source usually means the adhesive bond behind the tile has failed - often because moisture has already infiltrated. Retiling over compromised substrate without addressing the underlying damage will lead to the same problem recurring. If you hear hollow tiles, inspect for soft spots or moisture damage before proceeding with any surface repairs.
Signs Your Caulk Needs Replacing
Caulk tends to deteriorate faster than grout because it is constantly flexing and exposed to soap, cleaning products, and standing water. Plan to inspect bathroom caulk at least once a year. Replace it when you see any of the following:
- Gaps or separation: Caulk that has pulled away from the tile or tub surface - even partially - is no longer sealing the joint.
- Cracking or brittleness: Caulk that cracks when you press it gently has lost its elasticity and will not flex properly.
- Mold growth inside or beneath the bead: Black or pink mold embedded in or behind the caulk line cannot be cleaned away and signals the caulk must be removed entirely.
- Discoloration that won't scrub out: Yellowed or gray caulk that looks dirty even after cleaning is often harboring mold below the surface.
Most caulk in a busy bathroom needs replacing every two to five years, though lower-traffic bathrooms may go longer. The good news: removing and reapplying caulk is one of the most accessible DIY maintenance tasks in the home. For context on how caulk is used in other areas of the house, our caulk vs. weatherstripping guide covers air-sealing applications around doors and windows.
How to Replace Bathroom Caulk: Step-by-Step
Replacing caulk is a project most homeowners can complete in a couple of hours. Read through all steps before you begin.
What you will need
Remove the old caulk completely
Use a caulk removal tool, utility knife, or oscillating tool to cut and peel away all existing caulk along the joint. Work carefully to avoid scratching tile or the tub surface. Remove every bit - new caulk applied over old caulk will not bond properly and will fail prematurely.
Clean and dry the joint thoroughly
Scrub the exposed joint with a mildew-killing bathroom cleaner or a diluted bleach solution to kill any mold spores. Rinse well and allow the surface to dry completely - ideally for 24 hours. Caulk applied to a damp surface will not cure properly and may fail within weeks.
Apply painter's tape for clean lines
Run painter's tape along both edges of the joint, leaving a gap that matches the width of the bead you plan to apply. This step is optional but makes achieving a neat, professional-looking finish much easier, especially for first-timers.
Apply the caulk in a steady bead
Load a tube of bathroom-rated, mildew-resistant silicone or latex caulk into a caulk gun. Cut the tip at a slight angle to match your joint width. Hold the gun at roughly a 45-degree angle and apply steady, even pressure as you draw the bead along the full length of the joint without stopping.
Smooth the bead and remove tape
Dampen your fingertip or a caulk smoothing tool and run it along the bead in one continuous motion to press the caulk into the joint and create a concave, smooth surface. Remove the painter's tape immediately while the caulk is still wet, pulling it back at a low angle.
Allow full cure time before using the shower or tub
Check the manufacturer's label for the recommended cure time - most bathroom caulks require at least 24 hours before exposure to water, and some silicone formulas need up to 48 hours. Rushing this step is a common reason caulk fails early.
Seal Grout After Regrouting
Once new grout has cured - typically 48 to 72 hours - apply a penetrating grout sealer to help repel water and staining. Reapply the sealer annually in high-traffic bathrooms. Sealing is a quick step that meaningfully extends the life of new grout.
When to Call a Professional
Not every bathroom seal problem is a straightforward DIY fix. Consider calling a licensed tile contractor or bathroom remodeler if:
- Tiles move or feel soft when pressed - indicating the substrate behind them may be compromised.
- You notice water stains, swelling, or soft spots on walls, floors, or ceilings below the bathroom.
- Mold is widespread rather than contained to the surface of the caulk or grout.
- You suspect water has reached the subfloor or wall framing.
Moisture that has migrated behind tile can cause rot, mold growth inside wall cavities, and structural damage - problems well beyond what surface regrouting or recaulking can fix. The same principle applies to other moisture pathways in the home; our guide on keeping your basement dry explains how unmanaged water can threaten a home's structure from multiple directions.
Staying on top of grout and caulk maintenance is a small, low-cost effort compared to the repairs that follow when water finds its way in unchecked. An annual inspection - paired with prompt action when you spot early warning signs - is one of the simplest ways to protect your bathroom and your home.
Water Damage Behind Tile Is Hidden but Costly
By the time you see visible mold on grout or notice tiles shifting underfoot, water may have already been seeping into your wall cavity or subfloor for months. Repairs that reach structural framing or require full tile removal are substantially more expensive than timely surface maintenance. Annual inspection of grout and caulk is one of the most cost-effective habits a homeowner can develop.